M
mattisf
Hi
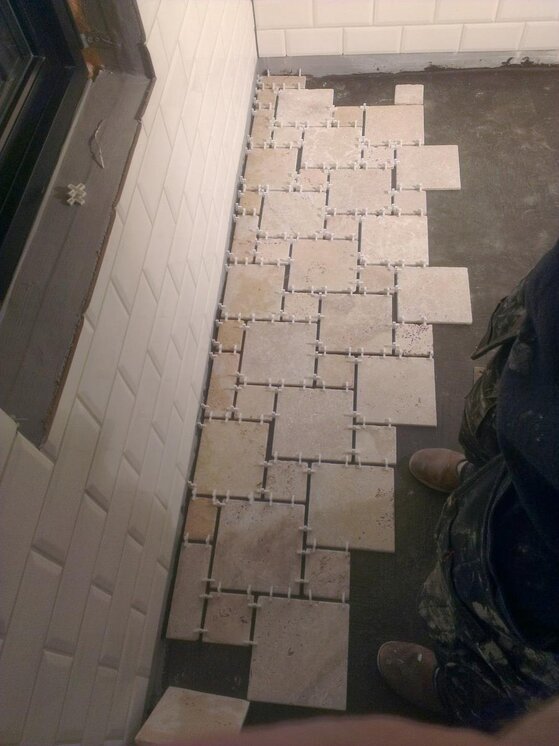
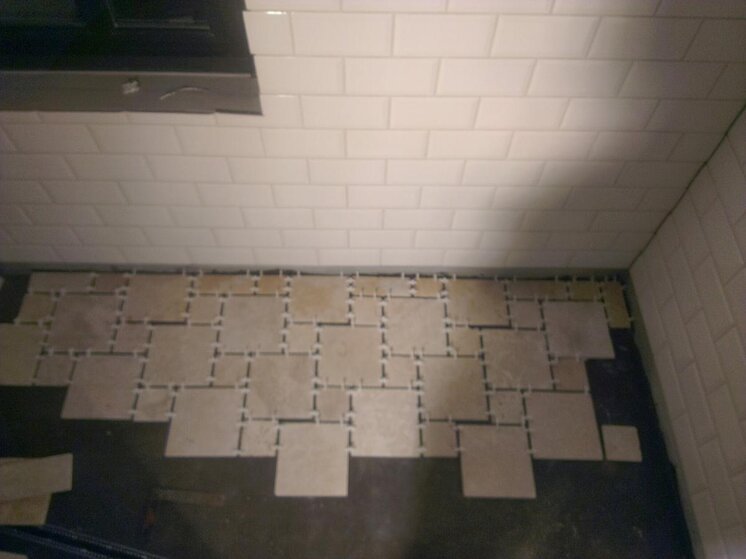
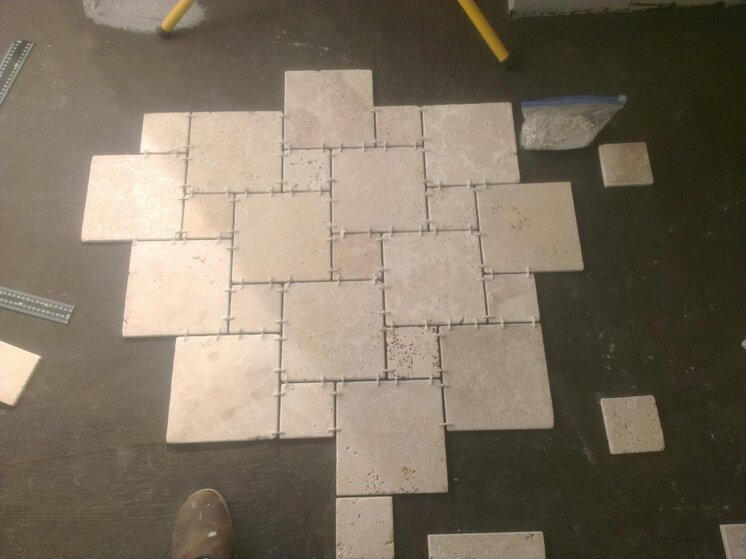
I am trying to install these tiles on my bathroom floor. They are laid out in a pinwheel pattern. As you can see from the pictures, there are some "slippage", which ends up with double width grout lines at regular intervals.
The large tiles are 20cm x 20cm, and the small tiles are 10cm x 10cm. The grout lines are 8mm. The tiles up against the wall have all been shaved off 3cm, to make the entire pattern centered in the room.
Please, what am I doing wrong? I can't figure it out. Thank you for reading!


