Currently reading:
Marble tiles on sloped ceiling

Discuss Marble tiles on sloped ceiling in the Canada Tile Advice area at TilersForums.com.

A

Adam Heron

Hi guys!

I am doing my first ever bathroom project and am after some advice from you true professionals.

I intend to tile half of a sloped ceiling with 610x305 marble tiles. There will also be some tiling onto brick walls. I'm not sweating about the walls so much, just the ceiling! I have spoken to tile giant, topps tiles etc with very limited response, hence why I'm now here.

"No one has asked me that in 20 years mate, I'll have to speak to the manufacturer!" :eek:

Have seen some previous advice of hardiebacker screwed to the joists, tiles adhered individually and supported for 24 hours. Would greatly appreciate any thoughts and input on this guys. I'm obviously looking at spending some serious money on this marble, doing it correctly and hopefully looking like I've had one of you guys do the job for me!! :D

Yes... I'm ambitious!

In terms of best tile adhesives, top quality mould resistant grout etc, what are your views and opinions on this? I'm certainly not a tiler, but and engineer with an eye for detail. Want everything to be done to the best possible standards. I'm not just prepared to walk out of a store with materials that I have been told are the best and suitable for the job. Need advice from professionals who actually do it for a living!

Greatly appreciate any help and input on this guys...

Adam
DSC_0186.JPG
DSC_0187.JPG
DSC_0188.JPG
 
A

Adam Heron

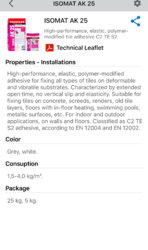
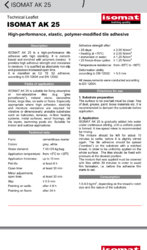
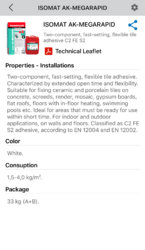
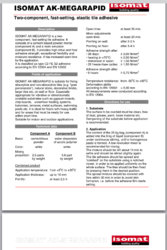
Here are some tech sheets for you read adam.
Ak25 is an S2
Mega-rapid is a two part adhesive, maybe this will help you understand the difference.
With the mega rapid, the fact that it is water free, will help prevent moisture issues with the marble.

View attachment 96681 View attachment 96682 View attachment 96683 View attachment 96684

Nice one 3fall

The megarapid looks like a good material for the job. Any additional advice or pointers when working with this adhesive? Cheers
 
O

Old Mod

Nice one 3fall

The megarapid looks like a good material for the job. Any additional advice or pointers when working with this adhesive? Cheers
No, only that it has a genuine pot life of 3 hrs. However, if you expect this might take a while, reduce the amount mixed at once, and make sure you weigh quantities correctly, as per ratio.
I’m sure I don’t need to remind you of that tho.
Otherwise you’ll be throwing away more than you use. :)
It’s also important to allow the adhesive to slake before re-mixing and using.
 
A

Adam Heron

No, only that it has a genuine pot life of 3 hrs. However, if you expect this might take a while, reduce the amount mixed at once, and make sure you weigh quantities correctly, as per ratio.
I’m sure I don’t need to remind you of that tho.
Otherwise you’ll be throwing away more than you use. :)
It’s also important to allow the adhesive to slake before re-mixing and using.

Much appreciated. Like the fact I won't face moisture issues with this product. I will obviously follow all instructions in terms of mixing etc. Once hardibacker is up, what notch trowel would you recommend? Can the tiles happily be applied one by one with no additional support?

Would also appreciate your opinion on the best brand(s) of grout and sealing of the marble once done.

Sorry for all the questions but this is my first tiling job and certainly not a simple one!
 
A

Adam Heron

Much appreciated. Like the fact I won't face moisture issues with this product. I will obviously follow all instructions in terms of mixing etc. Once hardibacker is up, what notch trowel would you recommend? Can the tiles happily be applied one by one with no additional support?

Would also appreciate your opinion on the best brand(s) of grout and sealing of the marble once done.

Sorry for all the questions but this is my first tiling job and certainly not a simple one!

Will use standard flat bed trowel unless you advise otherwise.
 
O

Old Mod

Errrm what’s a standard flat bed trowel?
Important things to note.
The flatter the substrate, (hardiebacker) the easier life will be and the amount of adhesive required will not be excessive.
Your goal is to achieve a full bed of adhesive beneath the tile, but just enough to achieve it, not excessive amounts. The thinner the full bed, the more strength it will have, and the more suction you can create to hold them in place.
Before fixing make sure the substrate, and the back of the tiles are dust free.
Hardiebacker state that priming is not required, only a wipe with a damp cloth to remove dust.
Many of us will prime regardless, but not a strong mix, enough to reduce suction from the board.
Yes you want to create suction between tile and substrate, but you do not want there to be a stronger suction between adhesive and substrate.
If this happen, moisture will be drawn to quickly from the adhesive and a brittle joint will be created.
Bit like a dry joint in soldering.
Priming the hardiebacker with an acrylic primer will slow down this suction between adhesive and board.
Trowel a 10mm notch of adhesive on to the hardiebacker, make sure it is all in the same direction.
The direction is determined by the size of the tile, it should be across the shortest distance ie with a 600 x 300, you should trowel parallel to the 300 side.
The reason is that when you bed the tile in you can expel all the air from beneath, troweling parallel to the 300 side allows the air to move over the shortest distance possible.
If you ‘rainbow trowel’ the substrate with adhesive, air will become trapped beneath when you bed it in.
Then take the back edge of the trowel and spread a thin coat of adhesive on the back of the tile, bedding in the adhesive as much as possible, forcing it in to the back.
This will provide a much better key on the tile, once keyed leave a 1mm skim on the back and bed your tile to the hardie.
Work the tile forward backward, or side to side which ever is required to break the ribs of adhesive beneath. Ie ribs left to right, move up and down, and vice versa.
Then remove the tile carefully, it should not be easy, it should have a full bed, so removal will be tricky.
If it drops away easily, there is insufficient adhesive to cope with either the unevenness of the substrate or tile.
Two options, increase size of trowel on substrate to 12mm, or use a very fine notch on the back of the tile as well as the 10mm on substrate.
Increasing to 12mm would be my choice, leaving a flat skim in the tile.
Work clean at all times, keep your tiles free of excess adhesive, and regularly clean out the joints as you go.
In essence, that’s it.
You can go further with the introduction of levelling clips, but for tonight at least, that’s your lot. :) :p
 
A

Adam Heron

Errrm what’s a standard flat bed trowel?
Important things to note.
The flatter the substrate, (hardiebacker) the easier life will be and the amount of adhesive required will not be excessive.
Your goal is to achieve a full bed of adhesive beneath the tile, but just enough to achieve it, not excessive amounts. The thinner the full bed, the more strength it will have, and the more suction you can create to hold them in place.
Before fixing make sure the substrate, and the back of the tiles are dust free.
Hardiebacker state that priming is not required, only a wipe with a damp cloth to remove dust.
Many of us will prime regardless, but not a strong mix, enough to reduce suction from the board.
Yes you want to create suction between tile and substrate, but you do not want there to be a stronger suction between adhesive and substrate.
If this happen, moisture will be drawn to quickly from the adhesive and a brittle joint will be created.
Bit like a dry joint in soldering.
Priming the hardiebacker with an acrylic primer will slow down this suction between adhesive and board.
Trowel a 10mm notch of adhesive on to the hardiebacker, make sure it is all in the same direction.
The direction is determined by the size of the tile, it should be across the shortest distance ie with a 600 x 300, you should trowel parallel to the 300 side.
The reason is that when you bed the tile in you can expel all the air from beneath, troweling parallel to the 300 side allows the air to move over the shortest distance possible.
If you ‘rainbow trowel’ the substrate with adhesive, air will become trapped beneath when you bed it in.
Then take the back edge of the trowel and spread a thin coat of adhesive on the back of the tile, bedding in the adhesive as much as possible, forcing it in to the back.
This will provide a much better key on the tile, once keyed leave a 1mm skim on the back and bed your tile to the hardie.
Work the tile forward backward, or side to side which ever is required to break the ribs of adhesive beneath. Ie ribs left to right, move up and down, and vice versa.
Then remove the tile carefully, it should not be easy, it should have a full bed, so removal will be tricky.
If it drops away easily, there is insufficient adhesive to cope with either the unevenness of the substrate or tile.
Two options, increase size of trowel on substrate to 12mm, or use a very fine notch on the back of the tile as well as the 10mm on substrate.
Increasing to 12mm would be my choice, leaving a flat skim in the tile.
Work clean at all times, keep your tiles free of excess adhesive, and regularly clean out the joints as you go.
In essence, that’s it.
You can go further with the introduction of levelling clips, but for tonight at least, that’s your lot. :) :p

You are a gentleman 3_fall. This is the exact advice I've been after. Ahem.. (being told exactly how to do it.) I'm now armed with enough advice to be a lot more confident and less dangerous! :tearsofjoy:

I will make sure you are rewarded for this priceless guidance :wink:
 
A

Adam Heron

Errrm what’s a standard flat bed trowel?
Important things to note.
The flatter the substrate, (hardiebacker) the easier life will be and the amount of adhesive required will not be excessive.
Your goal is to achieve a full bed of adhesive beneath the tile, but just enough to achieve it, not excessive amounts. The thinner the full bed, the more strength it will have, and the more suction you can create to hold them in place.
Before fixing make sure the substrate, and the back of the tiles are dust free.
Hardiebacker state that priming is not required, only a wipe with a damp cloth to remove dust.
Many of us will prime regardless, but not a strong mix, enough to reduce suction from the board.
Yes you want to create suction between tile and substrate, but you do not want there to be a stronger suction between adhesive and substrate.
If this happen, moisture will be drawn to quickly from the adhesive and a brittle joint will be created.
Bit like a dry joint in soldering.
Priming the hardiebacker with an acrylic primer will slow down this suction between adhesive and board.
Trowel a 10mm notch of adhesive on to the hardiebacker, make sure it is all in the same direction.
The direction is determined by the size of the tile, it should be across the shortest distance ie with a 600 x 300, you should trowel parallel to the 300 side.
The reason is that when you bed the tile in you can expel all the air from beneath, troweling parallel to the 300 side allows the air to move over the shortest distance possible.
If you ‘rainbow trowel’ the substrate with adhesive, air will become trapped beneath when you bed it in.
Then take the back edge of the trowel and spread a thin coat of adhesive on the back of the tile, bedding in the adhesive as much as possible, forcing it in to the back.
This will provide a much better key on the tile, once keyed leave a 1mm skim on the back and bed your tile to the hardie.
Work the tile forward backward, or side to side which ever is required to break the ribs of adhesive beneath. Ie ribs left to right, move up and down, and vice versa.
Then remove the tile carefully, it should not be easy, it should have a full bed, so removal will be tricky.
If it drops away easily, there is insufficient adhesive to cope with either the unevenness of the substrate or tile.
Two options, increase size of trowel on substrate to 12mm, or use a very fine notch on the back of the tile as well as the 10mm on substrate.
Increasing to 12mm would be my choice, leaving a flat skim in the tile.
Work clean at all times, keep your tiles free of excess adhesive, and regularly clean out the joints as you go.
In essence, that’s it.
You can go further with the introduction of levelling clips, but for tonight at least, that’s your lot. :) :p

Megarapid and full Raimondi RLS kit ordered. Could I have your business email please 3_fall.
 

Reply to Marble tiles on sloped ceiling in the Canada Tile Advice area at TilersForums.com

There are similar tiling threads here

Hi all, I'm hoping you can help with some feedback, please My parents are currently having a new bathroom installed, all stripped back to bare walls and floor. The fitter has done/hasn't done...
Replies
18
Views
772
I have moved into a new house and want to tile the downstairs bathroom walls. Its not a big room but my wife likes the idea of a feature wall tile and then a grey / white tile on the other 3...
Replies
1
Views
591
Hello, I'm just a home owner who doesn't have much experience with tiling but I'm looking for advice on fixing a few problems that a professional left me with. He of course has not responded to...
Replies
12
Views
2K
Hi all, I've laid some Arditex NA over the kitchen floor area (not under cabinets. The area is 4.5m x 1.8m. The top third of the room is totally level. The remainder of the room has a slope...
Replies
3
Views
1K
Hi! I'm looking for some advice, I have laid some SLC (Mapei 1210) in our conservatory in preparation for tiling. A couple of days after there's a lot of very fine cracks which have appeared, you...
Replies
5
Views
840
Posting a tiling question to the forum? Post in Tilers' Talk if you are unsure which forum to post in. We'll move it if there's a more suitable forum.

Advertisement

Top