Search the forum,

Discuss Grinding / Polishing / Small chips in the DIY Tiling Forum area at TilersForums.com.

J

Julian 'Farmer' Bonsall

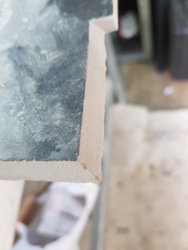
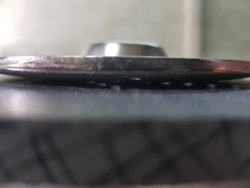
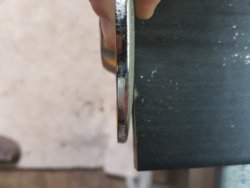
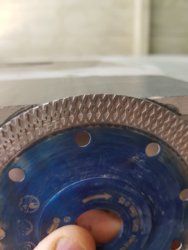
The disc is perpendicular to the tile (being the workpiece. Tile is held as shown in the images - glaze forms 90 degrees to the disc. If one uses any form of chop/sliding saw you typically set the blade at 90 degrees to your work piece ie perpendicular. I usually hold the blade stationary and move the work piece along it.

" Disc perpendicular to the tile surface, disc touching biscuit and ultimately glaze - outer radius/rim of the disc slightly protruding the glaze "

I will take some images as it will be safer than a video.

I suggested that the axis of the blade could be rotated to allow the front or rear to touch - I hold it so all axis are kept perpendicular to the tile so I grind it flat (seemed logical to me rightly or wrongly).

The way I have used the side of a cutting blade such that it is flat across the face of the tile was purposeful rather than using it at an angle which is a little how I feel the convex blade is behaving. As you can see from my images it works but it's different to what I was used to. How do you keep the cut face of the tile flat with the curved disc?

Moving to the silicon paper / flex backing pads - are these used at an angle to the face of the tile also?

I appreciate your help 3_fall and hope I haven't caused more greyness I am sure it's frustrating reading.

I have been tidying the edge of tiles up as I describe for a lot of years and maybe I have been doing it wrong and now a little confused.
 
Last edited by a moderator:
O

Old Mod

There’s no right or wrong way ultimately, if your technique works, why second guess yourself and change?
I can only see a benefit in changing methods if it drastically reduces working time.
Other than that, why bother.
As I said, every material is different, working with thin tile this is never more evident.
What blade will give a clean cut on one, generally doesn’t on another.
Bolstering my belief that every manufacturer needs a specific blade for their material, change material and use the same blade, it’ll mostly gives an inferior cut.
 
J

Julian 'Farmer' Bonsall

Some images to help.

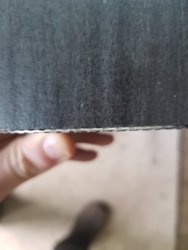
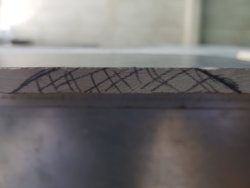
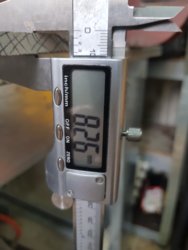
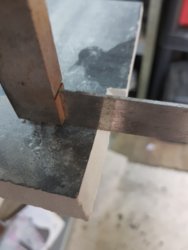
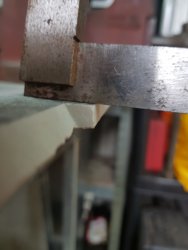
One image with pencil on the cut face shows the contact area with the 115mm disc on this tile (thickness shown in an image).
I have also shown one image of a miter which was cut (not ground) and had water applied from a small bore pipe application.

20180408_125539.jpg 20180408_125946.jpg 20180408_130008.jpg 20180408_130114.jpg 20180408_130210.jpg 20180408_130228.jpg 20180408_125627.jpg 20180408_125708.jpg 20180408_125934.jpg
 
J

Julian 'Farmer' Bonsall

Originally his started out as a concern regarding the single face wear to a cutting blade and then looking to use a flexible paper on a backing pad to do the same job.

Are there any instructional video of how to do the job I am attempting ?
 
B

Bill

The tiles you are cutting have a thin glaze/top layer, chipping will be hard to avoid without a decent wet cutter.

Work smarter not harder.
 
J

Julian 'Farmer' Bonsall

Tom - that particular floor tile was a stand out problem from tiles I have cut previously and selected due to the easy chipping and the dark colour to show the effect of the electroplate blade. The original cuts were done with a wet cutter using a Marcrist 180mm blade (Sorry I cant remember exactly which variant - its was from screwfix)

These cuts were done with a battery grinder as a way of showing what effect the new tool (the Electroplate grinding disc).

The close up images of a cut with minimal chips was done wet with a CK650 blade (almost new) in a battery tool. The mitre cut I have shown was done with the same blade which I dont think look bad? Or are they?

20180408_125539 - Edited.jpg
 
J

Julian 'Farmer' Bonsall

Well I wanted another try at the wet sponge method and also to use a makeshift water lubrication system. I was going to try the Silicone Carbide discs but I incorrectly set up my polisher which destroyed the back pad in less than a second.
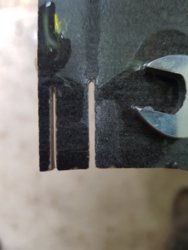
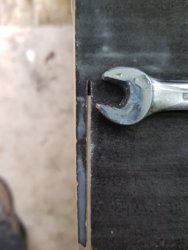
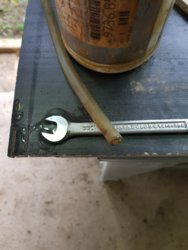
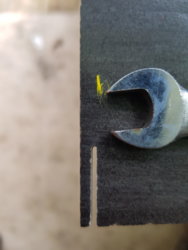
First is a dry cut (spanner for scale, yellow paint to help the camera focus).
Second a wet cut using a water flow to the front of the blade.
Third was with a wet sponge. I used a thinner sponge (not a car type, much thinner) and it worked a treat. Make sure you have the guards on properly.

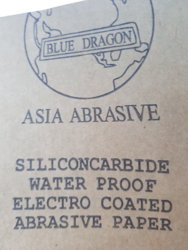
I also tried some Production 120 Wet and Dry paper (a low cost brand), in a flexible sponge wet block. It appeared to remove the glaze (biscuit much easier) slowly but left a nice edge - a patient process.

20180413_143904.jpg 20180413_144343.jpg 20180413_144800.jpg 20180413_144417.jpg 20180413_144545.jpg
 
Last edited by a moderator:
Reply to Grinding / Polishing / Small chips in the DIY Tiling Forum area at TilersForums.com

There are similar tiling threads here

Hi all. Just wanting some advice and wondering what the pros in here are using nowadays for...
Replies
2
Views
593
Hi all! Just wondering what the best advice is for book-keeping? Been self employed now for a...
Replies
1
Views
603
Good morning all. After a little advice. I'll post pictures a bit later. However.... The...
Replies
6
Views
869
I had a small leak in the main water line before the stop tap in my 1950s house. The copper pipe...
Replies
1
Views
652
Hi! I'm looking for some advice, I have laid some SLC (Mapei 1210) in our conservatory in...
Replies
5
Views
613
Please visit our sponsor websites, they keep the forum free to use!

Advertisement

New Tiling Questions

Replies you've not seen

Top