Discuss Full Wetroom Build Thread - Start to finish in the Tanking and Wetrooms Forum area at TilersForums. The USA and UK Tiling Forum (Also now Aus, Canada, ROI, and more)

Reaction score
73
Hi all
In a kind of 'Payment' for all the advice i have got from here i have decided to do a build thread for my wet room, it may help someone in the future it may not but here it goes!

Room size is 1.8M x 2.2M, at the end of the extension i finished building a last year. I work full time so this may take a while as it will just be me doing this...

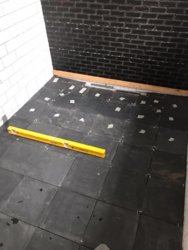
Screed is an anhydrite screed currently 50mm below finished floor level, i shuttered of 150mm before the screed went in to accomidate the drain.

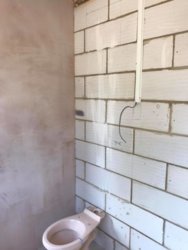
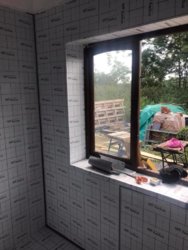
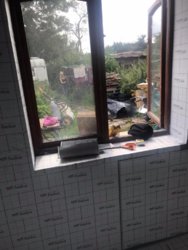
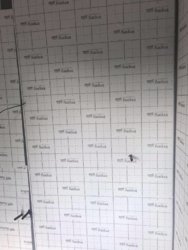
With that let's start with the blank canvas.

37931446_10160889598305457_8569778319069806592_n_10160889598300457.jpg

37973460_10160889598410457_4140220431778971648_n_10160889598400457.jpg

You can see the shuttered off area here
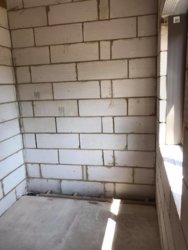
37930933_10160889598395457_7430706688128188416_n_10160889598390457.jpg
Rough toilet location
37963644_10160889565330457_1853969809239179264_n_10160889565320457.jpg


Ceiling already plastered
38001467_10160889563485457_2813344256238813184_n_10160889563460457.jpg
37998801_10160889565770457_6955174944271499264_n_10160889565765457.jpg


So first up we need to get our services in:
Toilet Overhead Cisten
Hot/Cold for sink
Feed to Wall mounted shower
Feed to wall mounted wand flexi shower thing
The shower will be digital so also some Cat5

Planning the pipe routes and flush mounting the clips As i am battening and boarding (Didn't feel i could get the finish i wanted with the DotnDab) i only needed to recess the surface mounted clips to just below the batten depth of 18mm. So with that in mind:
37914555_10160889565080457_6736470794332798976_n_10160889565065457.jpg
37922803_10160889564650457_628961573536268288_n_10160889564645457.jpg


Next up was making the copper pipework.
Now, i had no soldering iron but i can just about TIG Weld... Just Dan, just....

So making the pipes and installing

37971103_10160889564495457_2682001381778259968_n_10160889564480457.jpg


37982845_10160889564315457_5049076129118289920_n_10160889564285457.jpg
37989573_10160889684760457_8049764874533732352_n_10160889684740457.jpg


Next up was the extraction, used a 150mm inline fan from Vent-Axia

37944787_10160889564235457_9065876694212018176_n_10160889564230457.jpg
37927845_10160889563905457_285305146940850176_n_10160889563895457.jpg
37903443_10160889563985457_4737900779245928448_n_10160889563975457.jpg


Next up i wanted to battern all the walls rather than d+d as i wasnt confident enough to get a good finish.

So batten at 400mm centers.

Also placed ply around the pipes so i can a good fixing point

38280406_10160915629135457_8018175308467273728_n_10160915629120457.jpg
38284335_10160915629140457_6336267953599676416_n_10160915629125457.jpg
38424594_10160915628665457_8152605345290649600_n_10160915628650457.jpg
38433234_10160915628640457_5180871444023738368_n_10160915628625457.jpg
38483640_10160915629090457_7242453422526431232_n_10160915629085457.jpg


37963644_10160889565330457_1853969809239179264_n_10160889565320457.jpg
 
W

Waluigi

I remember the thread, Adam. Glad to see it making its way back on here. A great project!
 
Reaction score
73
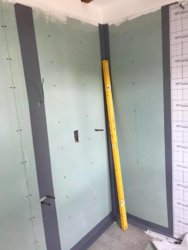
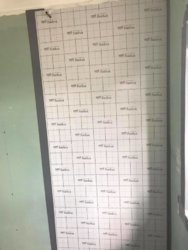
So with the walls batterned out it was ready for the moister resisting plasterboard, added plasterboard adhesive along with the screws

39105914_10160961865430457_2819300272071770112_n_10160961865425457.jpg
39245314_10160961865470457_2735502672693035008_n_10160961865450457.jpg


I next scrim taped and plastered the top strip to the beading then got plastering

39141021_10160961864515457_5198916091987886080_n_10160961864500457.jpg
39157791_10160961864565457_1342796567039442944_n_10160961864555457.jpg
39183687_10160961864495457_7787202893685194752_n_10160961864485457.jpg
39099506_10160961864695457_6264961480622342144_n_10160961864665457.jpg


Left it for a week to dry then masked, painted and painted the beams

39132208_10160961864895457_3334468289123319808_n_10160961864890457.jpg
39203645_10160961864940457_3955831532937019392_n_10160961864915457.jpg
39249592_10160961865035457_1544098235344224256_n_10160961865030457.jpg
39262696_10160961865150457_6721966479320809472_n_10160961865140457.jpg
39049637_10160961865180457_3334859745327579136_n_10160961865165457.jpg
39115491_10160961865270457_1178780454724042752_n_10160961865265457.jpg


And ceiling done!

Next up we have the floor! In the last update i go the linear drain in it's position. So next up was building the floor falls. I didn't want a tray because i preferred to make it. :)

So, the floor with Linear drain fitted to screed height

Tray in and packed with cement, there is a membrane between the anhydrite screed and the cement

39142960_10160961864800457_6153726861357613056_n_10160961864770457.jpg
37167505_10160961865120457_5993984026753368064_n_10160961865090457.jpg

So, time to remove the Anhydrite screed lattice.
Killer angle grinder!

40496256_10161035079645457_1500660160178159616_n_10161035079630457.jpg


Next up was time to make the falls, 20mm per meter for the first meter to the drain then 10mm per meter for the rest of the floor.

Jig'ing and welding the former:

40529499_10161035079505457_1451735448975048704_n_10161035079480457.jpg
40463349_10161035079440457_6372266793221750784_n_10161035079425457.jpg
40522474_10161035079255457_2853068125291675648_n_10161035079235457.jpg
40586910_10161035079100457_305043223200399360_n_10161035079090457.jpg

Rear former

40685756_10161035079415457_8263508929951039488_n_10161035079410457.jpg


Now i had a form in place to screed to i needed to primer the floor

40496319_10161035079270457_5404490685816504320_n_10161035079260457.jpg
40529505_10161035079140457_6039621056455507968_n_10161035079120457.jpg


Next up was the screed

First up i used Mapei floor adhisive to bond the screed to the floor/primer then a sharp sand 3/1 Mix with SBR.

Drain Masked off first of course

40491339_10161035079105457_2968516627164823552_n_10161035079095457.jpg


40520692_10161035079085457_7149523215142879232_n_10161035079080457.jpg


Here you can see the adhisive before the screed was compacted ontop

40595155_10161035079015457_3469492478837522432_n_10161035078990457.jpg


And done

40411099_10161035078920457_7547038604644581376_n_10161035078905457.jpg
40487970_10161035078940457_6010045056956760064_n_10161035078930457.jpg


Then all surfaces primered with BAL APD

40584423_10161035078925457_5513887136387956736_n_10161035078910457.jpg


And on with the Impey Tanking and sealed with Impey sealer

40542634_10161035078745457_2622546501687050240_n_10161035078735457.jpg
40557673_10161035078395457_2348010139132362752_n_10161035078390457.jpg
40536434_10161035078565457_6286123046482739200_n_10161035078555457.jpg
40541210_10161035078405457_7466179020594348032_n_10161035078400457.jpg
40491335_10161035078425457_216967110545375232_n_10161035078415457.jpg
40488497_10161035078550457_6958971132720447488_n_10161035078540457.jpg
40432261_10161035078570457_4421460886095396864_n_10161035078560457.jpg 40452361_10161035078420457_6380815216954834944_n_10161035078410457.jpg 40460114_10161035078545457_1463110279016480768_n_10161035078535457.jpg 40464203_10161035078740457_827286825209954304_n_10161035078730457.jpg 40468517_10161035078785457_128067004119646208_n_10161035078765457.jpg
 
Q

Qwerty

I remember it too. Thanks for taking the time to post this Adam. I'm looking forward to the next instalment
 
Reaction score
73
Next up the tiling

So first i put out the batten and set out
44943407_10161264749730457_8918949157255774208_n_10161264749725457.jpg


Then up and away with the tiling!
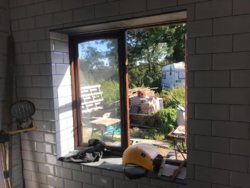
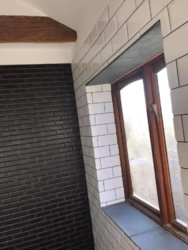
Got to the window corners and the bit i was dreading, the miters...
44972040_10161264739180457_5674657984299401216_n_10161264739170457.jpg

44939516_10161264739120457_6784866953975562240_n_10161264739110457.jpg
44940572_10161264739155457_1232820789804269568_n_10161264739140457.jpg
44963666_10161264738830457_8524541511600177152_n_10161264738790457.jpg

44940572_10161264739155457_1232820789804269568_n_10161264739140457.jpg
44936477_10161264738425457_695196750993948672_n_10161264738410457.jpg


44929192_10161264738920457_2040482157092143104_n_10161264738910457.jpg


44977673_10161264737890457_4953943784627896320_n_10161264737870457.jpg
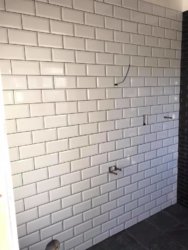
first wall done, i didn't want to grout the external mitre so i filled them all
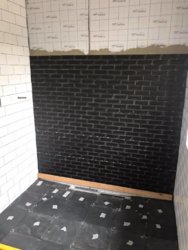
Next moved onto the floor and the other 2 wall's

44964386_10161264738475457_4720142940607873024_n_10161264738470457.jpg

labeled all the cuts for the floor
44936526_10161264738520457_3897685475409788928_n_10161264738480457.jpg
44932876_10161264738435457_8717060869432803328_n_10161264738415457.jpg
44938135_10161264737240457_1690917414570557440_n_10161264737230457.jpg
44939833_10161264737255457_6753592273436409856_n_10161264737245457.jpg


Next up me and my other half did the grouting...

Lovely job huh?! We used Epoxy grout, BAL Easypoxy AG Black, mostly due to wanting to make it as water tight as possible...

Using a set of digital scales to mix up exact amounts and using empty mastic tubes to apply the grout with

45066097_10161264738155457_2551101395755335680_n_10161264738120457.jpg
45027263_10161264737920457_3609069003173003264_n_10161264737885457.jpg
44979705_10161264738270457_6774834833790074880_n_10161264738175457.jpg


44948313_10161264737490457_5078680174753480704_n_10161264737475457.jpg


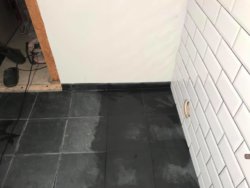
And the floor.. the dark patches are just water

44936465_10161264749530457_616072088918163456_n_10161264749510457.jpg
44982853_10161264749555457_1549983629029933056_n_10161264749535457.jpg
45008485_10161264737050457_2130275719794655232_n_10161264737040457.jpg
45044512_10161264737045457_8347116597286010880_n_10161264737035457.jpg


And done, this shows the miters after filling and cleaning

45095148_10161264737735457_460941121476886528_n_10161264737715457.jpg
45023186_10161264737540457_4507769194506354688_n_10161264737525457.jpg
44977585_10161264737445457_2684248530142363648_n_10161264737440457.jpg


44929184_10161264739365457_7291386697894330368_n_10161264739360457.jpg 44977585_10161264737445457_2684248530142363648_n_10161264737440457.jpg 44932876_10161264738435457_8717060869432803328_n_10161264738415457.jpg 44932955_10161264737290457_6104334548475052032_n_10161264737265457.jpg 44936526_10161264738520457_3897685475409788928_n_10161264738480457.jpg 44959244_10161264737020457_4423791975300333568_n_10161264737010457.jpg
 
Reaction score
73
Next up was the toilet, we found a old i guess 80-100 year old toilet on ebay so we brought that... Was all original, original seat, lead pipes and all!

39144016_10160961864755457_2313977033027223552_n_10160961864735457.jpg

39242289_10160961864725457_1687367521021198336_n_10160961864715457.jpg


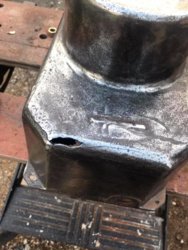
The cisten was full of holes as you would image as it had been sat empty for 20 years..

54433637_10161831363225457_7738163721603645440_n_10161831363220457.jpg

55441096_10161831363280457_8672611789030031360_n_10161831363275457.jpg


So first cleaned it up with a wire wheel

55517456_10161831363410457_5324635655962099712_n_10161831363405457.jpg


Re-welded the corner back in
54731386_10161831363130457_217293626844119040_n_10161831363125457.jpg
55786388_10161831362985457_8662445150468833280_n_10161831362980457.jpg


As there was a few pin holes i decided to fibreglass the inside to make it effectivly 'New'
Before
55646614_10161831363425457_2184582196818345984_n_10161831363415457.jpg

After

55451652_10161831362915457_3459650677242855424_n_10161831362905457.jpg

With that done and a coat of clear lacquer i got it up
54729086_10161831362840457_4156068831036440576_n_10161831362830457.jpg

Added a new socket ready for the new flush pipe

53915107_10161831362860457_1554451382860251136_n_10161831362850457.jpg


and made the new flush pipe, tig welded copper and lacquered

54521725_10161831362670457_1842581540245078016_n_10161831362665457.jpg
54798937_10161831361685457_7785013538401026048_n_10161831361680457.jpg


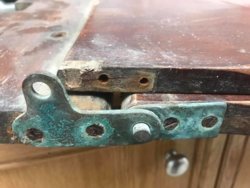
sanded the toilet seat and re-made the rear section and cleaned the original fixings

before:
54434946_10161831362730457_4184040887883399168_n_10161831362720457.jpg
54520566_10161831362480457_116636966568591360_n_10161831362475457.jpg

55719440_10161831362650457_2213918580091650048_n_10161831362645457.jpg

After

55560538_10161831362415457_1875067972792352768_n_10161831362410457.jpg
54730857_10161831362250457_5961142022453592064_n_10161831362245457.jpg


and done

55483201_10161831362145457_1498417731983114240_n_10161831362140457.jpg
54520566_10161831362480457_116636966568591360_n_10161831362475457.jpg 54521207_10161831363290457_6456687871528009728_n_10161831363285457.jpg
 
W

Waluigi

Oooh, I don’t remember seeing the cistern before. Did it come with the ‘Bell’ inside it?
 
Reaction score
73
Next i wanted a solid stainless steel towel rail but they were mega ££££ so i made one..

IMG_2908.jpg

54799609_10161831362095457_2932942220505907200_n_10161831362090457.jpg

IMG_2909.jpg
IMG_2912.jpg
55949788_10161831362265457_3615556641467924480_n_10161831362255457.jpg


All done, and pressure tested ready to be hung

54730266_10161831361980457_812604415084068864_n_10161831361975457.jpg


I also made a basket to hold our soaps and sponges, all stainless once again as it was a wet room


54525180_10161831362450457_1089796102514802688_n_10161831362445457.jpg
55498749_10161831362315457_665114280361721856_n_10161831362310457.jpg


We then had a waterproof unit made and i made some taps for it

53484774_10161831361870457_7198505921289388032_n_10161831361860457.jpg
54731338_10161831361920457_2331432269744439296_n_10161831361915457.jpg


6264b096-eca7-40e5-bae4-18da6eb3fb50.JPG
IMG_3684.jpg
IMG_3683.jpg

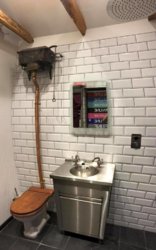
And some pics of it all completed

55713764_10161831362510457_1189625848441864192_o_10161831362505457.jpg


IMG_3786.jpg
IMG_3785.jpg
IMG_3782.jpg
IMG_3783.jpg
IMG_3679.jpg
IMG_3674.jpg


IMG_3781.jpg
54514893_10161831361795457_2509596322160443392_n_10161831361790457.jpg IMG_3784.jpg
 

Reply to Full Wetroom Build Thread - Start to finish in the Tanking and Wetrooms Forum area at TilersForums.com

Or checkout our tile courses and training forum or the Tile Blog / Latest Blog Posts

This website is hosted and managed by www.untoldmedia.co.uk. Creating content since 2001.
Tile Contractor Forum. The useful tile contractor website.

UK Tiling Forum Stats

Threads
67,337
Messages
881,115
Members
9,528
Latest member
Alex Carr
Top
AdBlock Detected

We get it, advertisements are annoying!

Sure, ad-blocking software does a great job at blocking ads, but it also blocks useful features of our website. For the best site experience please disable your AdBlocker.

I've Disabled AdBlock    No Thanks