I
Ian
Just thought I knock up a thread with step by step pictures of an electric underfloor heating installation.
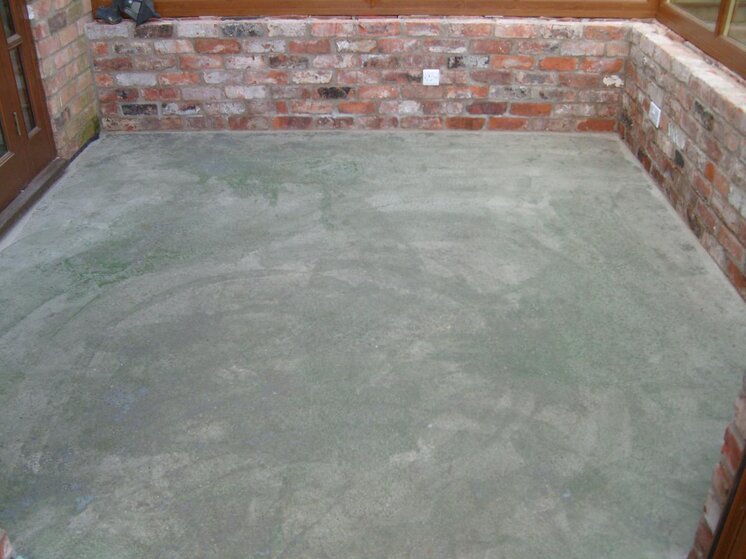
Bare concrete floor (primed), 9 square metres. 100mm thick so was left 3 months to dry before I even thought about starting the job.
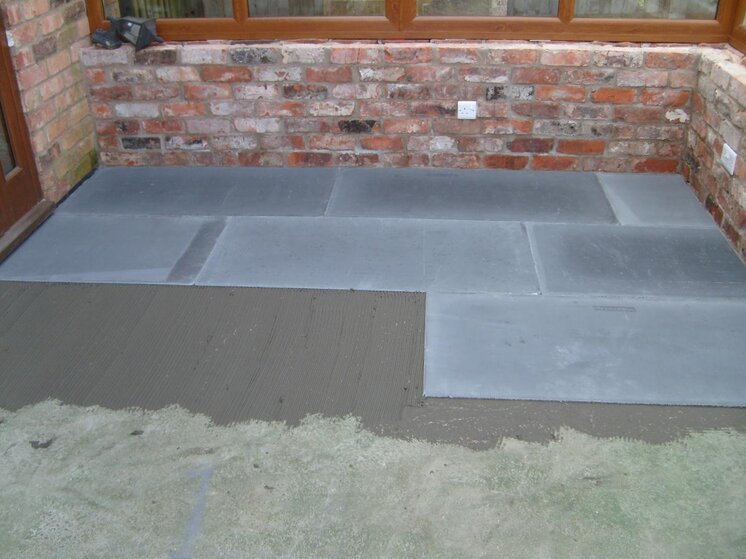
6mm insulation boards staggered and stuck to the substrate using a single part, flexible cement based adhesive. 1st picture, work in progress.
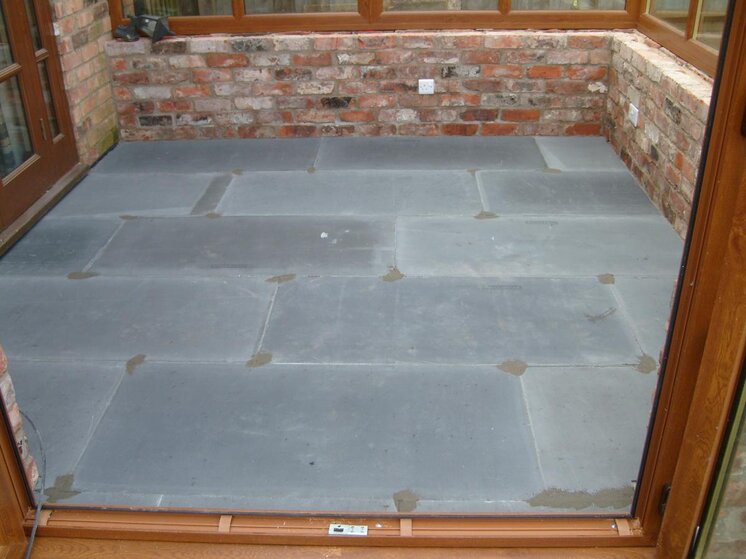
2nd picture, insulating complete. This particular brand says to butt joint the insulation boards so no need to leave expansion gaps between boards (check the manufacturers instructions).
(Check the mat is working and not damaged before this stage commences). Roll the mat out but do not stick it down until you are sure you have evenly covered the area and you are happy with the positioning. (This floor is 9m2 so the mat purchased is 8m2, remember the mat CAN NOT be shortened). To make turns in the mat cut the mesh but be VERY careful not to cut the wire, in the image below you can see where I have opened the mat up in places to get an even distribution. When you are happy with the positioning of the mat stick it down (this one has double sided tape on the underside). It is also worth mentioning at this point that when you roll the mat out make sure the power cable is closest to where the thermostat is going to be positioned.
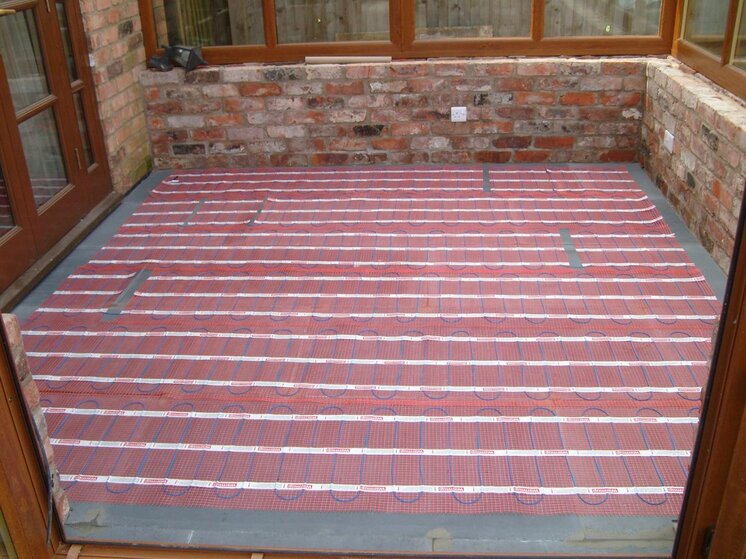
In the same corner/part of the room you will now need to put the thermostat probe into the floor. This one is 200mm into the room (minimum for this manufacturer is 150mm. Check before fitting for different brands) and is placed in a conduit for protection. Make sure the probe DOES NOT go underneath any of the wires, this could cause the mat to malfunction or burn out and fail.
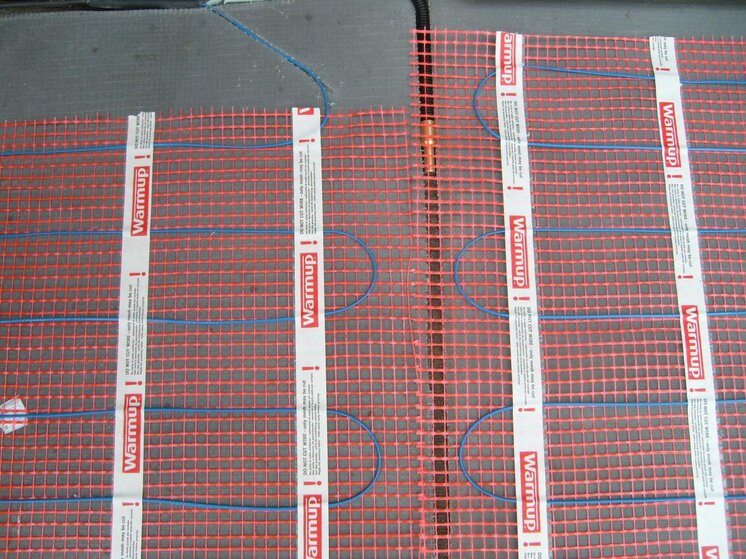
It is also worth mentioning that regular checks should be done throughout the fit to ensure the heating cable is still working and has not been damaged at any point. This mat came with a 'watchdog' that the power cable is connected to, and sounds an alarm if there is a break in the circuit from damage. Next stage cover the mat in flexible adhesive (same as the one used to fix the insulation boards), again be careful not to damage the mat, and stick down any bits of cable or mesh that are protruding. This stage could be skipped but I find it useful for sticking down any awkward bits of cable or mesh that won't lay flat.
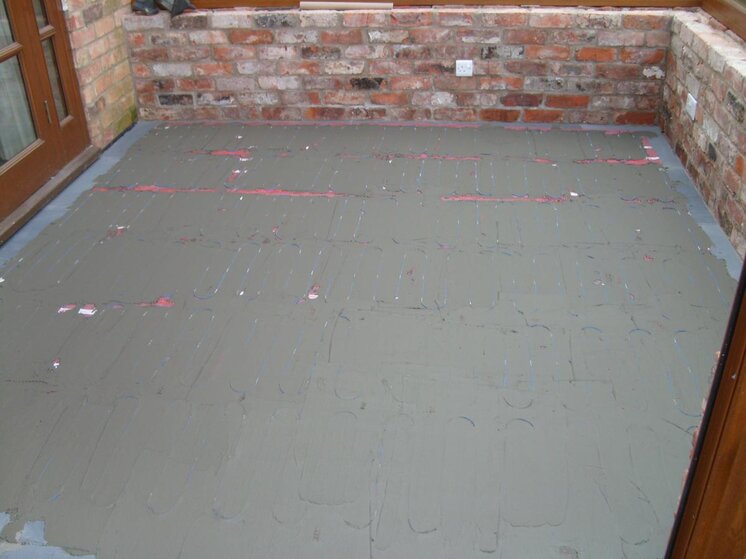
Final stage (apart from electrical installation) is to put a flexible self levelling compound over the whole area.
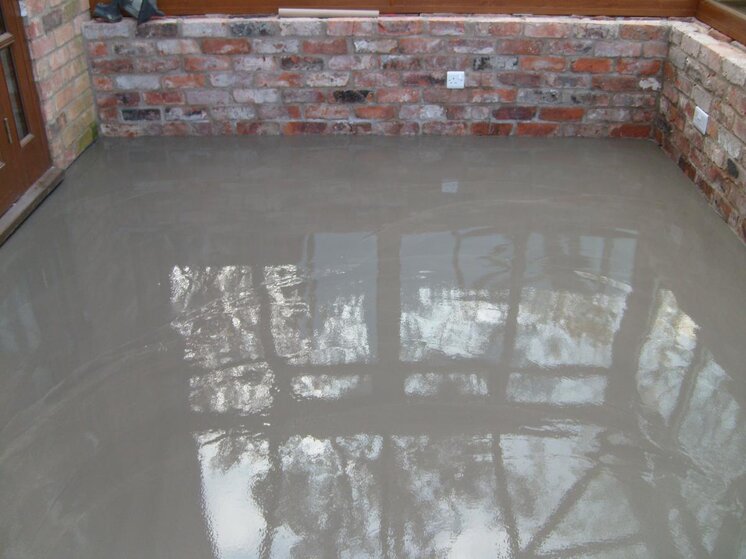
When this has been given time to cure (48 hrs is ample) the electrical connection can be made and thermostat connected (by a qualified electrician) and the floor can be commissioned. This must be done before any tiling commences and the UFH must be switched off 24 hrs prior to the floor covering being laid.
Always read the instructions supplied with the product as there will be variation from each manufacturer.
I hope this is of use to somone and I hope I haven't left anything out! I'm sure someone will let me know if I have


Bare concrete floor (primed), 9 square metres. 100mm thick so was left 3 months to dry before I even thought about starting the job.

6mm insulation boards staggered and stuck to the substrate using a single part, flexible cement based adhesive. 1st picture, work in progress.

2nd picture, insulating complete. This particular brand says to butt joint the insulation boards so no need to leave expansion gaps between boards (check the manufacturers instructions).

(Check the mat is working and not damaged before this stage commences). Roll the mat out but do not stick it down until you are sure you have evenly covered the area and you are happy with the positioning. (This floor is 9m2 so the mat purchased is 8m2, remember the mat CAN NOT be shortened). To make turns in the mat cut the mesh but be VERY careful not to cut the wire, in the image below you can see where I have opened the mat up in places to get an even distribution. When you are happy with the positioning of the mat stick it down (this one has double sided tape on the underside). It is also worth mentioning at this point that when you roll the mat out make sure the power cable is closest to where the thermostat is going to be positioned.

In the same corner/part of the room you will now need to put the thermostat probe into the floor. This one is 200mm into the room (minimum for this manufacturer is 150mm. Check before fitting for different brands) and is placed in a conduit for protection. Make sure the probe DOES NOT go underneath any of the wires, this could cause the mat to malfunction or burn out and fail.

It is also worth mentioning that regular checks should be done throughout the fit to ensure the heating cable is still working and has not been damaged at any point. This mat came with a 'watchdog' that the power cable is connected to, and sounds an alarm if there is a break in the circuit from damage. Next stage cover the mat in flexible adhesive (same as the one used to fix the insulation boards), again be careful not to damage the mat, and stick down any bits of cable or mesh that are protruding. This stage could be skipped but I find it useful for sticking down any awkward bits of cable or mesh that won't lay flat.

Final stage (apart from electrical installation) is to put a flexible self levelling compound over the whole area.

When this has been given time to cure (48 hrs is ample) the electrical connection can be made and thermostat connected (by a qualified electrician) and the floor can be commissioned. This must be done before any tiling commences and the UFH must be switched off 24 hrs prior to the floor covering being laid.
Always read the instructions supplied with the product as there will be variation from each manufacturer.
I hope this is of use to somone and I hope I haven't left anything out! I'm sure someone will let me know if I have


